

|
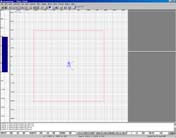
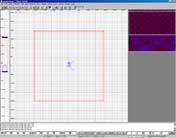
Getting started with HMF2Radiant, Part 2-- Iceheart First room First off, start up HMF2 Radiant (Hereby refered to as F2R), you will see a big window with a grid and 4 smaller windows, 2 of them gray. The big gridded window is the 2D View (Click for explaination), this is where you create your brushes and do things like clipping, vertex and edge manipulation etc. The left Gridded window is the Z View, this views the current height profile at the location of the Z Checker (Don't worry, I'll explain it later)The top gray window to the right is the Camera View, this is a 3D window where you see a preview of your map and also where you do most of your texture alignment. The bottom gray window is the Texture Browser, here you choose what texture you want to use (figures). The small white window at the very bottom of your screen is the Console, this is a fairly useless window but if something odd happens and you can't figure out why, check if it says something here. Ok! Let's get down to business then. If you are new to mapping I recommend you read all the dictionary entries (The bold links in this text). First, we will create a hollow box (A room... you know). Start by placing the cursor at the coordinate 256, -256 in the upper left corner (you may need to scroll by holding the right mouse button and dragging your mouse), click and hold your left mouse button and drag the mouse to coordinate -256, 256 in the opposite corner of the window, Now look at the Z View and set the brush height to 256 by dragging the mouse slightly above the dark blue box (if you drag inside the box, you will just move the brush). That's it! Your first brush! Now to make this a room you will need to press the Hollow button. Notice that the interior volume of the box you just created always is previous volume-grid size the hollow tool always hollows inwards, and always the the current size of the grid. If you take a look at the camera window in this stage you will see that you are inside your room, so now we will learn to control the camera. Basic camera controls: A/Z
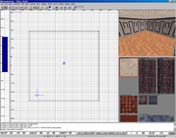
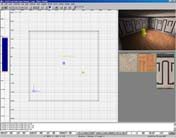
: Tilt Up/Down Ok, it's a room, now we need to make it look like one! This requires texturing, so click the "textures" menu and then the "eden" texture set (I will use eden for this tutorial, feel free to use another if you wish), now wait some time for the textures to load (this may take some time if your computer is slower than about 400MHz). Notice that all your brushes are highlighted with a red tint, this means that they are selected. Hit ESC to unselect them all and use your newly learned camera controls and the Shift+LMB (Left Mouse Button) combination to select the 4 wall brushes. Hold the RMB in the texture browser to scroll and find a suitable wall texture. I used the "wl_inside_4" texture. Now deselect the brushes with ESC and select the floor brush and assign a texture to it, I used the "fl_edenhouse4" texture. Repeat this for the ceiling, this time I used the "cl_church" texture. (TIP! Notice how the textures are named? wl_ for wall, fl_ for floor and cl_ for ceiling. Know that the textures are alphabetically sorted in the texture browser and finding apropriate textures will be easy for you) Now we need to add some entities like light, and a player start. Let's start with the light. Just Right click in the center of the map and choose "light" from the pop-up menu that appears. Move the light by dragging it in the 2D View(s) to a good position. Now to set it up, hit "N", this is the entity window, here you set up your entities. We are only going to do one thing with the lamp and that is changing how bright it is. In the "Key" field, enter "light" and in the "value" field enter "500". This is the diameter of the light in units. (TIP! There's a cool lighting preview feature in F2R, just goto View/Lighting and play around with the controls) The next entity we are going to place is the info_player_start entity, which defines where the player will spawn when entering the map. Add this the same way you added the light entity but instead of choosing "light" you click the "info" option, then "player" and then "start". Make sure the entity is not stuck in the ground or else you will have problems moving. Now hit the "N" key and click one of the "angle" buttons to choose which direction you will spawn. Notice that a small arrow will appear pointing in the direction the player will face when spawned. Now you're at the final leg for this map! First off, save it in your "C:\FAKKTools\fakk\maps" directory as "tutorial_1". Now go into the "BSP" menu and choose the menu option "BSP_FullVis" and wait a few seconds (This takes a LONG time on bigger maps). Now just bring up your "Run" box and enter this command line: "C:\FAKKTools\fakk.exe +map tutorial_1" If everything checked out you will soon be standing in your first room! Here's my version of this map. |
|
|
Empty
F2R
|
|
 |
|
|
First
brush
|
|
 |
|
|
Hollowed
first brush
|
|
 |
|
|
Textured
room
|
|
|
|
|
 |
|
| Map with player start, light entity and lighting preview on | |
| <Previous part | Next part> |