
|
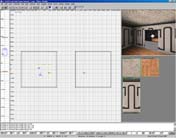
Getting started with HMF2Radiant, Part 3 -- Iceheart More rooms and advanced texturing In this excercise we will add more rooms and do some other stuff like Edge Manipulation, texture scaling, layering and rotation etc. Start by opening the map tutorial_1 from the last tutorial, if you don't have it download it here. Now we will make a hole in one of the walls in order to make a corridor to the next room. Shift-LMB (Select, in the Camera View) the wall to the right in the 2D View and resize it by dragging just outside the brush, size it to the 64 mark on the ruler to the right. Now hit Space, this clones your brush, move it down in the 2D View until it hits the edge. Select any one of them, clone it again and move/scale it so it fits in the hole between the other 3 brushes and then scale it upwards (using the Z View), scale it to the 192 mark. This should leave a hole in the wall, just big enough to walk through. We
are now going to clone the room and flip it over to the
other side. Select all the brushes in your room by drawing a box
that covers all the brushes in the room and in the "Selection"
menu, choose "Select Complete Tall". All brushes will
now be selected and the selection brush is discarded but we don't
want to clone the player start, so Shift-Click it to deselect
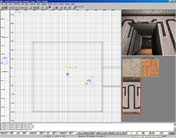
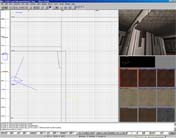
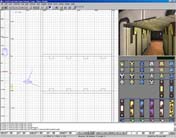
it. Hit space and click this button : Try to create a corridor in between without using the hollow button this time! Watch out so the brushes don't overlap, it generates odd texture trashing and slows the machine down (since it has to draw the same face twice). If you have followed the instructions you will notice that some textures are misaligned, cure this by Ctrl-Shift-Clicking on all faces with the wall texture applied and then click with the MMB on any of them. This will align all the wall faces to the same offset so they match up correctly. You will also see that in the corridor, two faces in the ceiling are textured with the wall texture, select these and MMB click the ceiling. Let's place some cool light fixtures in the corridor! Make a brush about 16x32 units big (I used the genmetal_1 texture for this) and place it in the corridor (see picture). Switch the 2D View to YZ Mode and hit E to enter Edge Manipulation mode. Pull the edges as shown in the picture. Basically make a wedge shaped brush. You'll have to reduce the grid size in order to do this. Select the big face (the one facing the corridor) and apply the texture lt_edenlt11 or any other light in the same size, now take a look at the Texture toolbar, lowest down on the screen. Here, hit the "Fit" button and then the "Y Flip" button. We now need to set up the light to actually emit light, this is done by Middleclicking it in the Camera View and pressing S. In the "Light" field enter 2000. Click the color swatch and choose an appropriate color for the lamp. Select
the whole brush and clone it, distribute it at even spaces
in the corridor. You'll have to use the Make your own light fixtures in the rooms if you're feeling ambitious. If you do you can delete the light entitied (Backspace key) Let's add another room here (don't forget lighting). A big one, make a large room a little below the other rooms (we're going to build stairs here) and make the necessary holes for connecting them. Then try to make the tunnel down with Edge Manipulation, don't build a floor for now. To
make the stairsteps you will need to make many small brushes and clone
them multiple times. I used the texture "edenstair2"
for the steps. Take a look at the walls next to the stairs, they look kinda odd don't they? We will fix these by rotating them. Select both faces and hit S to bring up the Surface Inspector. I recommend you choose another texture first though, as the current wall texture looks odd when rotated, I used the "wood" texture. Now we'll do something called "Texture Layering", it's basically making walls out of several brushes with different textures. In this particular excercise we will make a trim at the bottom the the wall and texture it in a darker texture. To do this, select all the brushes, scale them upwards then clone them and move them down. Now texture the lower part in another texture (I used "wl_basement2"). This technique of layering brushes to make walls is very common and adds quite a bit of variety to your levels. This ends this tutorial, compile and have fun! Here's my version of the map. |
|
|
Hole
in the wall
|
|
 |
|
|
Before
"Select Complete Tall"
|
|
|
And
after... Spawn deselected
|
|
 |
|
|
Room
mirrored and cloned, I adjusted the grid size somewhat.
|
|
 |
|
|
Some
of the errored textures
|
|
|
All
the wall faces selected and aligned
|
|
 |
|
|
The
wedge shaped brush/Light fixture
|
|
 |
|
|
Light
in the tunnel!
|
|
|
|
|
| <Previous part | Next part> |